Lego Batman
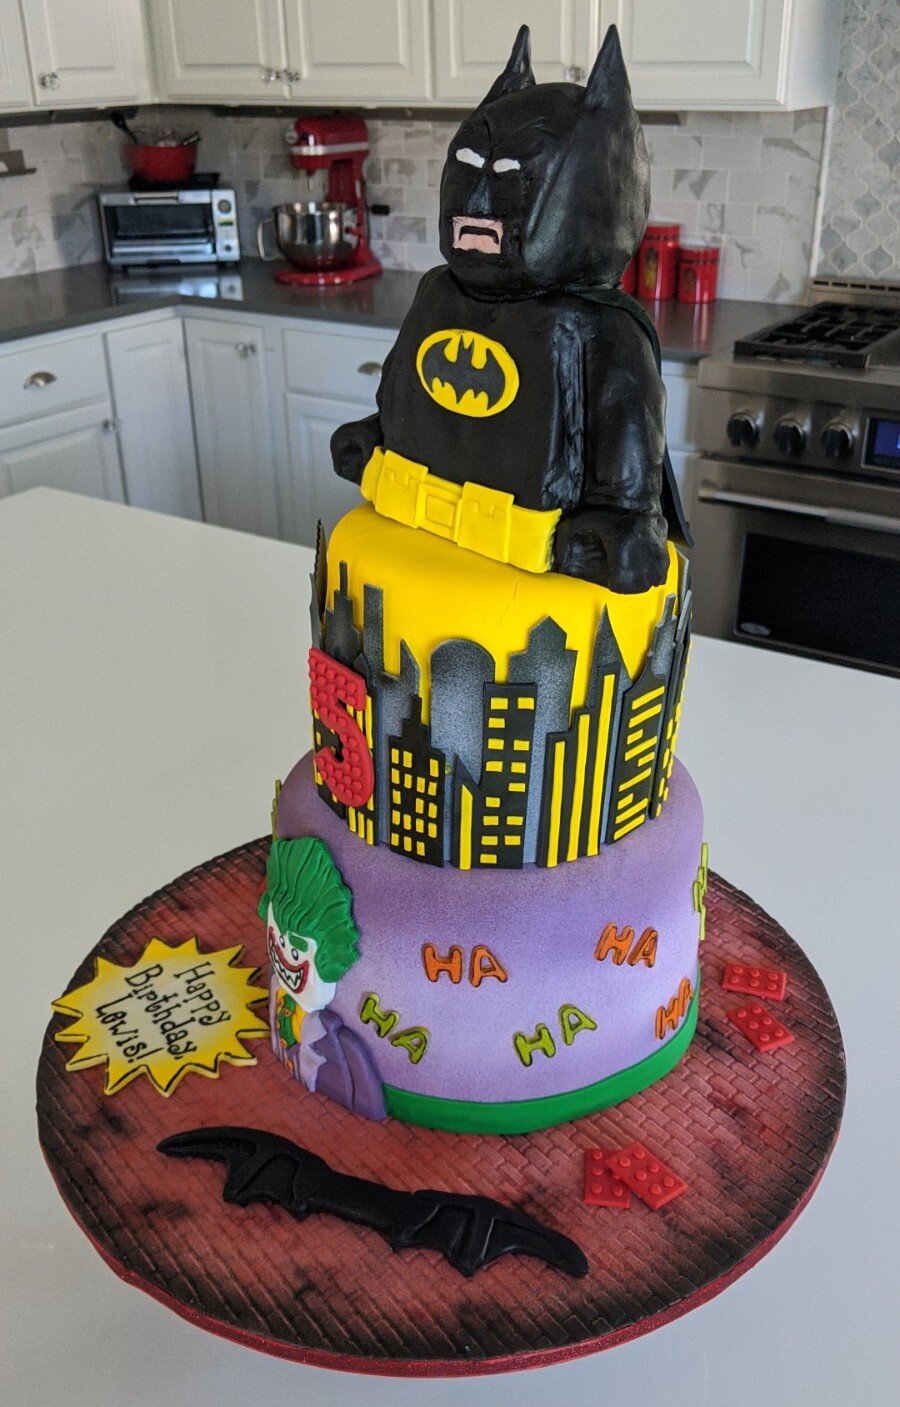
I am so honored to be a Sugar Angel for Icing Smiles and to have made this cake for a little boy, Lewis, who just loves Lego Batman!
The cake tiers are layers of chocolate cakes with yellow buttercream, topped with a sculpted Batman made from RKTs and modeling chocolate. Everything is edible! As with all my Icing Smiles dream cake requests, I apply a lot of energy and heart to the design and execution. This one was a doozy, but it was such a joy to see his face as he beheld his 5th birthday cake!
Notes from the Kitchen
Every cake I make starts with a sketch!
The amount of cake supplies I have is almost obscene. :) I have molds, cutters, and supplies for almost anything… including this 10” silicon mold of a Lego minifig! I used it to press in RKTs and create the starting shape for Batman for the top tier. I then set it aside to set up for a few days before covering it in modeling chocolate.
The cake board is a 16” wooden circle. I colored white fondant with a few colors to yield a brick red and used an impression mat to achieve the brick pattern. I then used my pizza cutter around the outside to clean up the edges (one of my favorite tools!)
I painted petal dust on the board in both red and black to appear dirty for the streets of Gotham.
I then airbrushed the board all over in red and around the edges in black. Finished with a sparkly red ribbon border.
I cut out the birthday boy’s age and used an icing tip to cut circles for lego studs.
One of my tricks is to print coloring pages and use an exacto knife to precisely cut out logos. Like the bat symbol!
After the RKTs had set a few days, I covered the figure in black modeling chocolate.
After a lot of care and sculpting, I arrived at the final shape. I then airbrushed it black to polish the look.
I created his utility belt from yellow fondant and added it along with the logo and flesh colored fondant for his mouth.
Added white for the eyes and painted both the eye and mouth fondant with luster dust. Once dry, I drew on his mouth with a black edible marker.
With Batman done, it was a huge relief! I set him aside to set and turned my energy to other elements.
I used my acrylic stamps for the inscription in much better print than if I piped it myself!
I gently pressed the lettering into the fondant and centered my cutter around it to cut it out.
Using an edible marker, I traced over the imprinted lettering and added an outline.
I cut out strips for the grey buildings and took a lot of time cutting out the tops to have different looks along the skyline.
I then did the same for the black buildings, to sit in front of the grey at a slightly shorter height.
Needing a quick break from the building work, I airbrushed the inscription with a little yellow pizazz! The 5 also received red airbrushing.
With a lot of detail and patience, I cut out and placed yellow strips and pieces for the lighting on the buildings.
The black buildings were then airbrushed yellow and the grey ones with a bit of black for shadow.
I added Batman’s cape using fondant and airbrushed with black.
I cut out HAs for the Joker tier.
I then outlined them with a black edible marker.
Annnnnd then airbrushed them for dimension.
I made a batarang from modeling chocolate and set it aside.
I baked four 8” and four 6” rounds in dark chocolate and colored a double batch of buttercream yellow.
After leveling the cakes, they were filled and crumbcoated with yellow bc before covering in fondant.
I started with the larger tier and used my trusty pizza cutter to trim away excess. Then I moved on to the yellow tier.
It’s a major milestone in cake construction once the tiers are covered in fondant. I always allow myself to breathe a huge sigh of relief!
I airbrushed each tier for more depth of color.
I transferred the bottom tier to the cake board and added dowels to support the weight of the upper tiers.
I then added the middle tier and drove a long dowel through both to stabilize the stack.
As I created Joker, I placed him on the tier a section at a time.
Dude, it took me over an hour to make all his little pieces. I’m very detailed and strive for near perfection when I make characters. (sob sob)
I finally placed all his little parts! I will paint him when the rest of the cake is in place.
I added a strip of green around the bottom tier.
Next I worked on the middle tier, placing the shadow buildings first.
I love this house — my kitchen island is massive!
I then placed the black & yellow buildings around the tier, offset in front of the grey ones.
Once the buildings were in place, I added the 5 and surrounded the Joker tier with HAs.
For the last touch, I hand painted the Joker with shades of disco dust, added detailing to his little suit and tie and then placed the final elements on the cake board. Voila! I then super-cleaned the kitchen and took photos of the finished cake! Boom — looks just like my sketch. Mostly. :)


